
Trello Documentation
Service Desk Automation: Complete Guide
With Hipporello's service desk automations, you can streamline repetitive tasks, automatically update tickets, notify requesters, and ensure every request follows the right workflow. This complete guide gives you an overview of all the features and use of Hipporello's Service Desk automations.
Automations allow support teams to handle requests faster while maintaining a consistent process.
Service desk automation allows your support system to automatically perform actions when specific events occur in your collaboration tool: Trello, Notion, Asana or Jira.
For example, when a request is submitted through a form or email, automation can:
Assign the request to the right team member
Add labels to categorize the request
Move the request to the appropriate list/workflow
Send a confirmation email to the requester
How Service Desk Automations Work
Hipporello's automations follow a simple rule structure and are easy to use:
When → Then
When (Trigger) – defines the event that starts the automation
Then (Action) – defines what the system should do once the automation has started
Additionally, automations include:
Conditions – rules that determine under which conditions the automation should run
Delays – time-based pauses before executing an action
Using Conditions in Service Desk Automations
Conditions allow you to control when an automation should run. Instead of triggering an action every time an event occurs, you can specify rules that must be met based on your workflow. For example:
Trigger:
When a request is created
Condition:
If label = "Urgent"
Action:
Notify the support team immediately
This rule means the support team will be notified if a request with the "Urgent" label is created, which allows you to build smarter workflows by filtering automation behavior based on request data.
Adding Delays to Automation Rules
Sometimes actions should happen after a certain amount of time, rather than immediately. This is where delays are useful. Delays allow you to pause an automation before executing the next action. Example:
Trigger:
When a request is created
Delay:
Wait 3 hours
Action:
Send follow-up message to requester
This is useful for, for example, sending reminders, escalating unresolved tickets, or following up on support requests. Delays allow support workflows to include time-based automation.
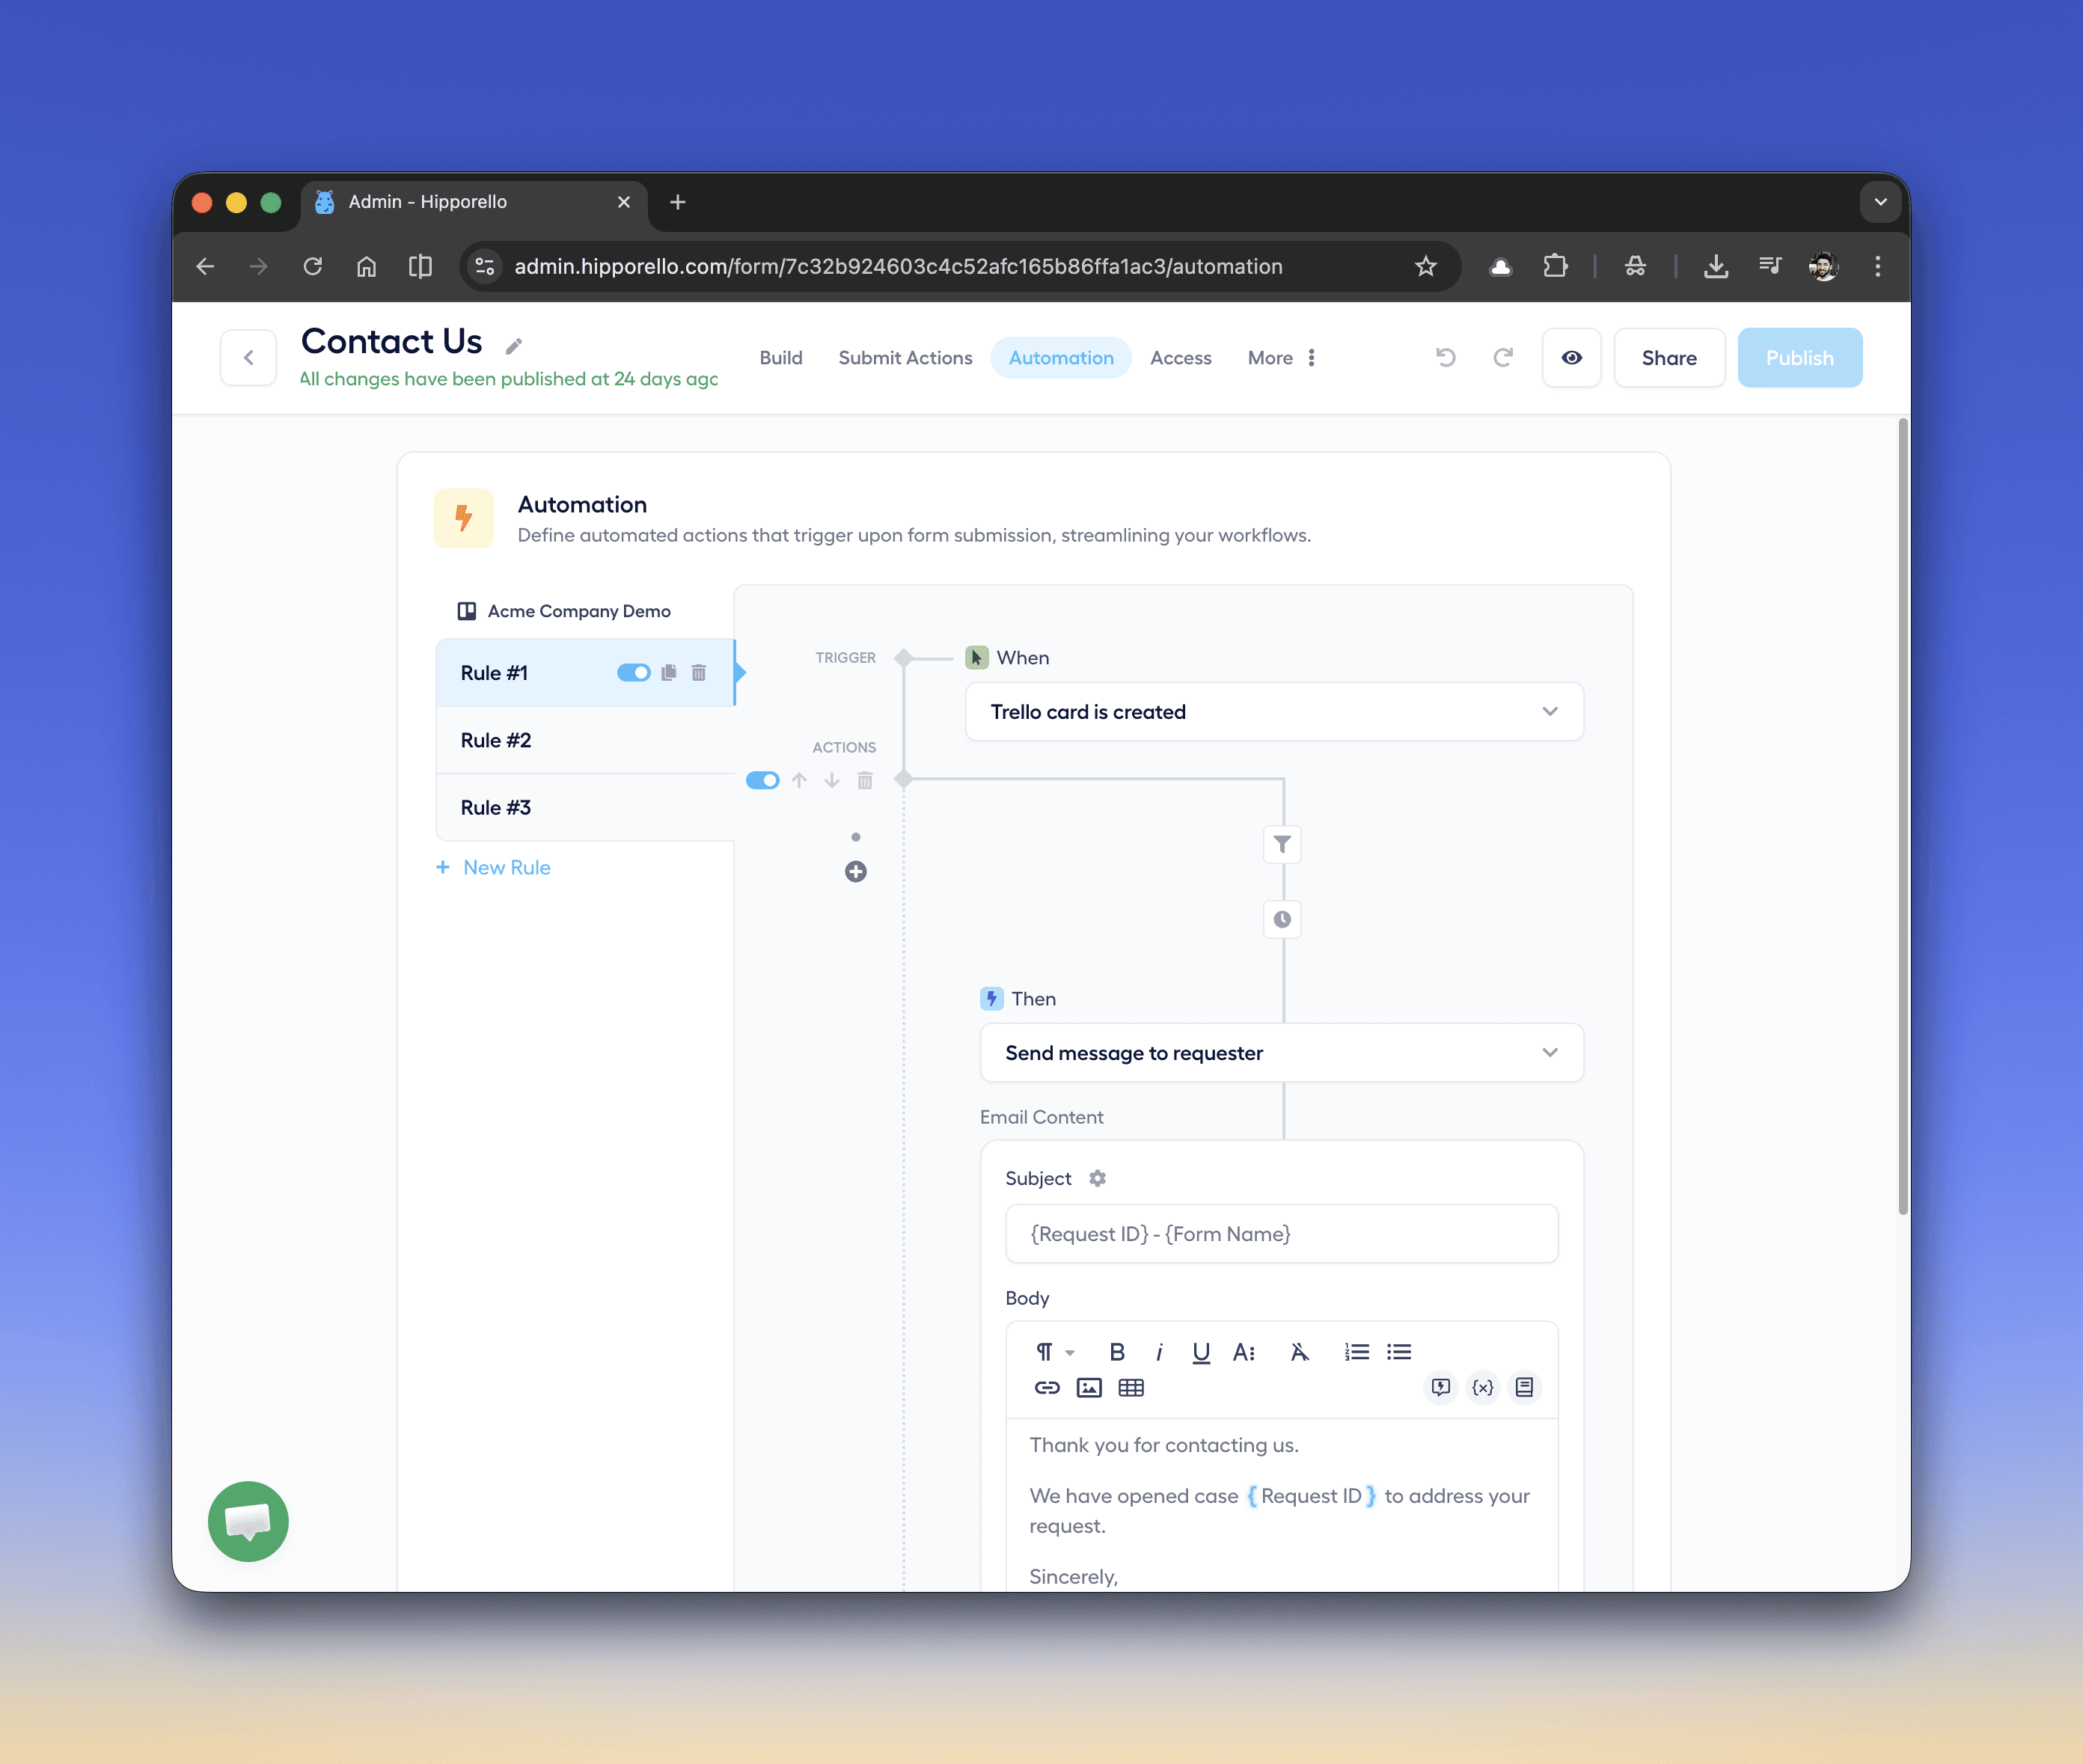
How to Create an Automation Rule
Follow these steps to configure automation in your Trello service desk.
1. Open the Automation Section
Go to your service desk admin panel. Choose a form or email for which you want to add workflow automations. Click the form and click the Automations tab on the top menu.
2. Create a New Rule
Click New Rule to start building an automation. Each rule contains:
Trigger
Conditions (Optional)
Delay (Optional)
One or more actions
3. Select a Trigger
Under When, choose the event that starts the automation. Examples:
A request/ticket is created
Trello card is moved
Comment added to card
Requester replies
4. Add Conditions (Optional)
If needed, add conditions to control when the automation should run.
For example:
Only run if label = "Bug"
Only run if request type = "HR"
Conditions help create more precise workflows.
5. Add Delay (Optional)
Insert a delay if the action should not run immediately. Click the Add delay button, choose the time you want to delay the action and hit Apply.
Examples:
Wait 5 minutes
Wait 1 hour
Wait 24 hours before sending a reminder
6. Add an Action
Under Then, choose the action the automation should perform.
For example:
Send message to requester
You can customize the email content using dynamic fields.
7. Enable the Rule
Turn on the rule using the toggle switch.
Once activated, the automation will run automatically whenever the trigger conditions are met. Do not forget to publish your changes once your automations are ready.
Managing Automation Rules
Each automation rule can be easily managed from the automation panel. You can enable or disable rules using the toggle switch, allowing you to quickly activate or pause automations as needed.
Additionally, rules can be copied to create similar workflows faster, or deleted if they are no longer needed. This flexibility makes it easy to update and maintain your automation setup as your service desk processes evolve.
NOTE THAT while the core principles of service desk automation remain the same for all platforms that Hipporello natively integrates with, the way you implement them might differ slightly. If you’re using Notion, continue to our service desk automation in Notion guide to build flexible workflows. Teams managing tickets in Asana can explore service desk workflow automation in Asana. If you use Trello as a service desk, see how to create a Trello ticketing system with automation, or learn how to scale operations with Jira service desk automation.
Any other questions? Get in touch